The term “pricking out” may not be familiar to everyone. It is a step that is carried out every so often, depending on the plant.
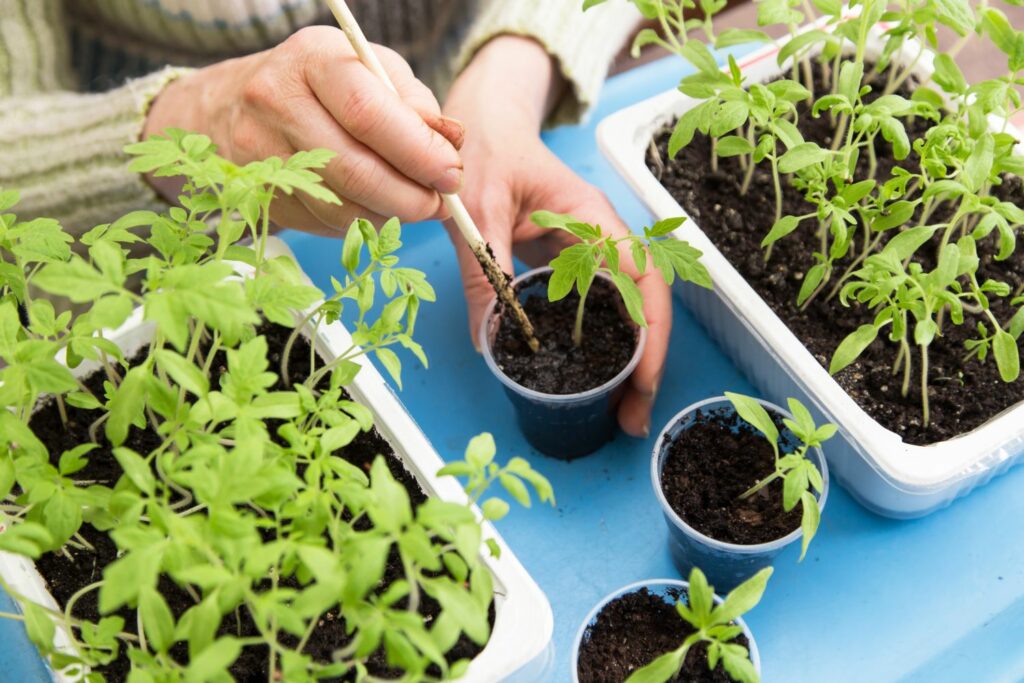
Tomatoes are one of the plants that are commonly pricked out [Photo: Viktor Sergeevich/ Shutterstock.com] “Pricking out” means separating seedlings growing together and transferring them to their own spot in the bed or pot. When many seeds are sown together in the same container, they gradually grow larger and larger until they become too dense, at which point it is time to prick them out. Read on to find out everything about this important gardening method.
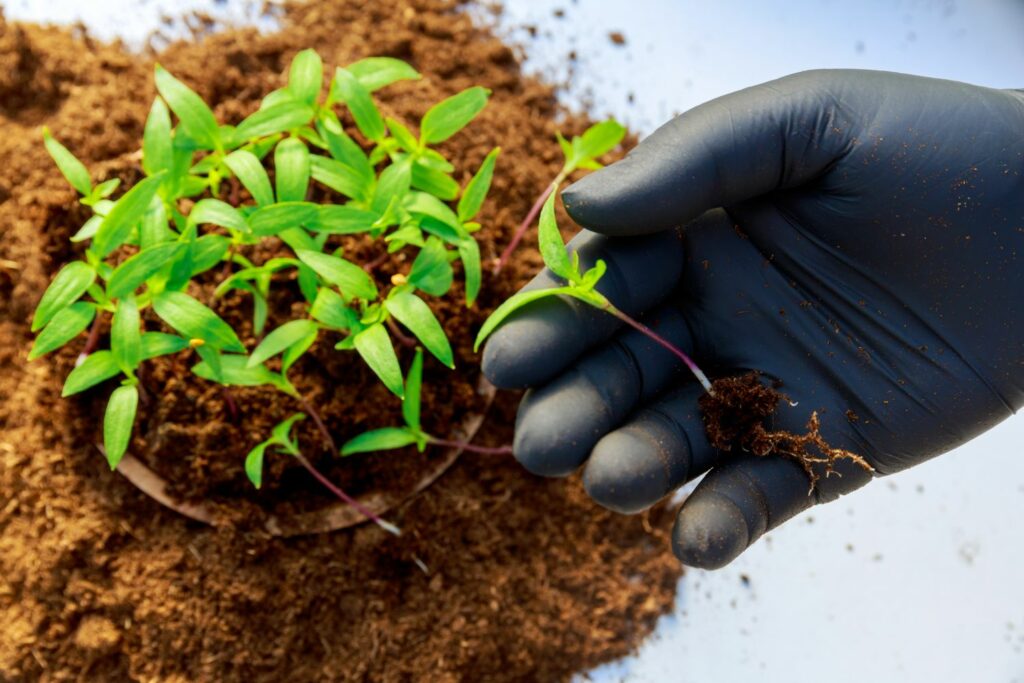
What is pricking out? In horticulture, pricking out is the process of separating seedlings or young plants that are growing too close together . During this process, weaker plants are usually also discarded.
The purpose of separating the small plants is to provide them with enough space to grow. As the seedlings grow larger, they begin competing with each other for water, light and nutrients. During pricking out, they are carefully removed from the substrate with an appropriate tool and transplanted at a greater distance from one another or into individual pots. In larger nurseries, this step is often considered too time-consuming, which is why they use specific seeds and sowing techniques to avoid pricking out. However, for hobby gardeners and in smaller nurseries, it is a common practice.
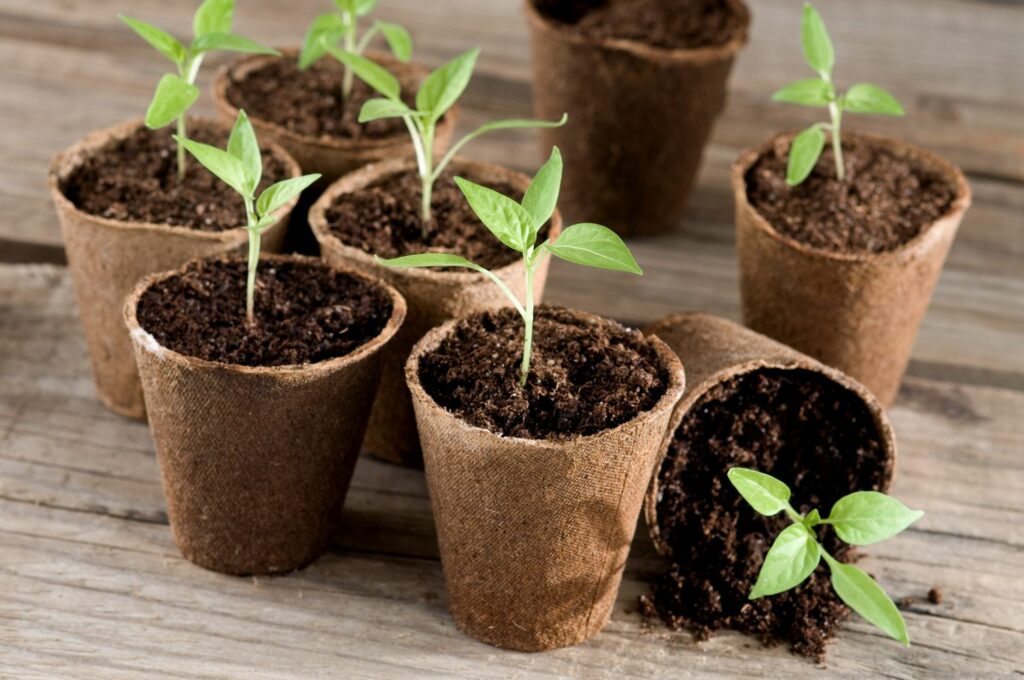
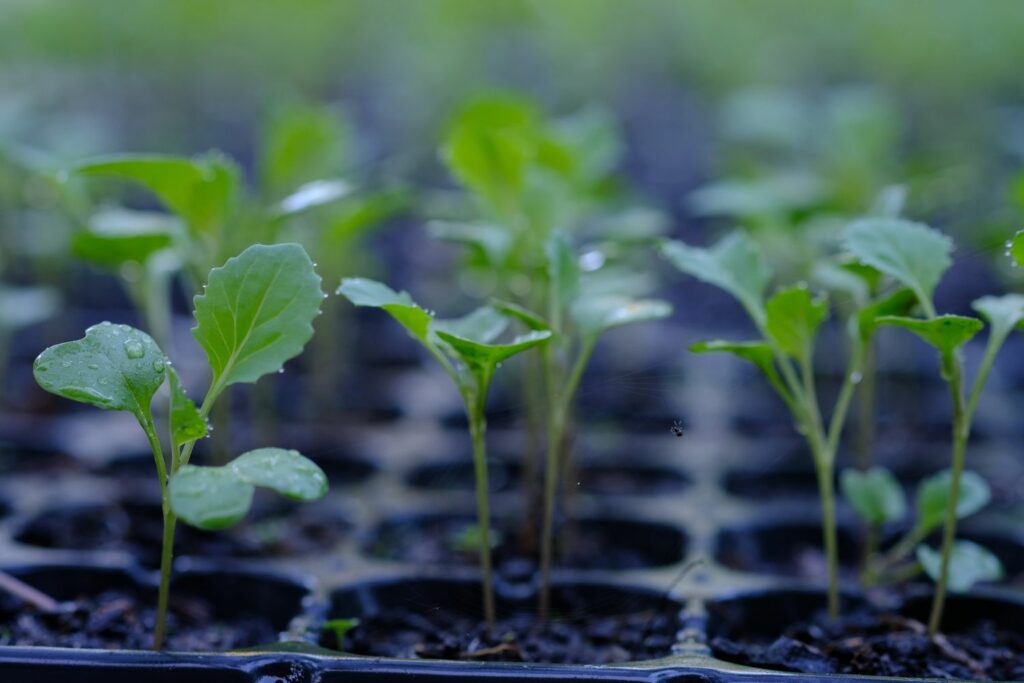
Once the seedlings are in their own pots, they will have enough nutrients and space at their disposal again [Photo: Petra Schueller/ Shutterstock.com] When to prick out seedlings The optimal time for pricking out seedlings is when the plant’s cotyledon stage is complete and the first true pair of leaves is showing. By then, the seedlings have grown enough to cope with pricking out.
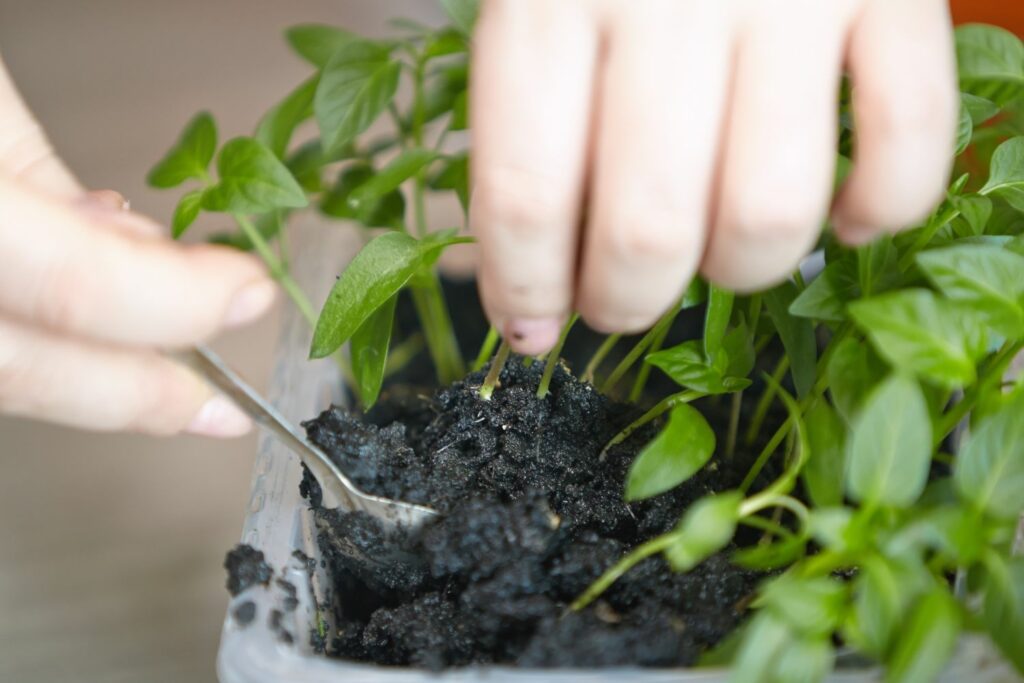
The first true pair of leaves can be seen between the two large cotyledons [Photo: ZhakYaroslav/ Shutterstock.com] Instructions for pricking out plants Pricking out requires some practice and finesse, as the seedlings are still very delicate and can break easily. You will also need a pricking out tool, but you can also use household items such as a small spoon. Here is our step-by-step guide of what to look out for and how to prick out seedlings:
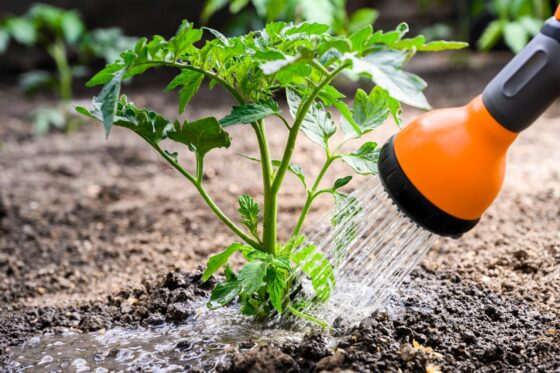
If transplanting seedlings into pots, fill the pots with some substrate and lightly press down. This ensures the seedlings can be placed in soil again as quickly as possible. Water both the substrate with the seedlings and the substrate in the new pots well before pricking out. This makes it easier to separate the seedlings and also helps them to adjust to the new environment. Now, take your pricking out tool and insert it into the substrate next to a seedling. Then carefully lift the plant out of the substrate from beneath the roots. While doing so, gently hold the plant close to the root neck − do not apply pressure or pull too hard. If the hypocotyl (the germination stem) breaks, regrowth is no longer possible. Seedlings can also be easily lifted from wet soil using a spoon [Photo: Shmelev Dmitriy/ Shutterstock.com] After removing a seedling from the substrate, make a hole in the soil of the new pot. Then, insert the roots of the seedling into this hole. If the root system, or the plant itself, is quite long, use the pricking out tool to carefully push it into the hole. It is beneficial for the growth of the seedling that the radicle (the embryotic root directly under the germination stem) is upright in the hole. Ensure the root neck is in the soil as well. Carefully press the soil around the seedling with your fingers to fill in the hole. Watering is an important step for the healthy rooting of the freshly pricked out seedlings − it restores the contact between substrate and roots. Water the pots either from below or above. If the substrate has already been watered in advance, this step is not necessary. Seedlings of different plants are often difficult to distinguish from one another, so be sure to label the pots to identify the species and variety. To reduce water stress on the seedling, a temporary cover can be placed over the plants. This will increase the humidity and protect the recently handled fine roots while they readjust. Tip: Plants such as tomatoes can be planted deeply up to the cotyledons when pricking out, as they have the ability to form new roots on their stems. However, this phenomenon only occurs in some plants, so do your research for the seedlings you wish to transplant ahead of time.
Kohlrabi plants, unlike tomatoes, should not be planted deeply in the soil up to the cotyledons [Photo: Mont592/ Shutterstock.com] The right tool for pricking out seedlings The pricking out tool (dibber) is a plastic, wood or metal stick. It is about 18 centimetres long and tapers to a point. If you do not have a dibber, feel free to use a ballpoint pen, a wooden popsicle stick or a small spoon.
What soil is used after pricking out? As the roots of the seedlings are still very delicate, use a low-nutrient seedling soil after pricking out. This ensures that the young plants become strong and robust and develop vigorous roots in their search for nutrients. A healthy root system also enables the plants to better nurture themselves later, for example during dry periods. We recommend transplanting the seedlings into our Plantura Organic Herb & Seedling Compost after pricking out. It has a loose and airy structure and is low in nutrients to help stimulate the root growth of young plants.
Some plants, such as tomatoes (Solanum lycopersicum ) and peppers (Capsicum ), require more nutrients than others. For such plants, it is indeed advisable to mix the seedling soil with a nutrient-rich soil to avoid undersupplying the young plants with their required nutrients. Of course, there are other plants with more specific soil requirements. Succulents, for example, need a mineral-rich substrate.
Organic Herb & Seedling Compost, 20L
2 -saving composition Which pots are suitable? Which pot sizes to use when pricking out depends on various factors. These include how quickly the plant grows, how much space the plant requires, and how long the plant will stay in the pot. The number of seedlings can also play a role. If you are pricking out a lot of seedlings, it might be worth your while to use pricking out trays. When there are a smaller number of seedlings, they can be pricked out into one pot, as long as there is enough space for each one to continue growing.
Special pricking out trays are particularly suitable for a large quantity of seedlings [Photo: NDAB Creativity/ Shutterstock.com] Pricking out is a method that is often used, especially when growing tomatoes. Find out everything you need to know about pricking out and planting tomatoes in our specialised article.
Subscribe to the Plantura newsletter ...and receive exciting gardening tips, special offers and a 10% discount on your next purchase in the
Plantura shop !
{ "products": [ { "name": "All Purpose Plant Food, 1.5kg", "unitPrice" : "Base price: £6.66/kg", "compareAtPriceString": "£12.99", "priceString": "£9.99", "compareAtPrice": 12.99, "price": 9.99, "sale":false, "percentage":"23%", "badge": "angebot", "url": "https://www.uk.plantura.garden/products/all-purpose-plant-food-1-5-kg", "available": true, "availabilityInfo":"", "campaignInfo":"","isSet": false, "priceLabel": "", "compareAtPriceLabel": "","reviewsData":{"reviewCount": 4, "reviewAverageValue": 4.8},"image": "https://www.uk.plantura.garden/cdn/shop/products/plantura-all-purpose-plant-food_1100x.jpg?v=1656335807","tags": "angebot,berries,box tree,cherry laurel,fig tree,Flowers,garlic,granular fertiliser,Hedges & Shrubs,Herbs,Houseplants,lavender,lettuce,oleander,palm tree,palm trees,pampas gras,plant fertiliser,slow release fertiliser,Vegetables","bulletPoints": ["Perfect for a variety of plants in the garden \u0026 on the balcony","Promotes healthy plant growth \u0026 an active soil life","Long-lasting fertiliser that is free from animal products - child \u0026 pet friendly"],"variants" : [ {"sku": "GF-APPF-A03K","available": true, "compareAtPriceString": "£12.99", "priceString": "£9.99", "compareAtPrice": 12.99, "price": 9.99, "sale":true, "percentage":"23%", "priceCurrency" : "GBP", "url" : "https://www.uk.plantura.garden/products/all-purpose-plant-food-1-5-kg?variant=37777826840739","isSet":false}, {"sku": "GF-APPF-3KG1","available": true, "compareAtPriceString": "£25.98", "priceString": "£19.49", "compareAtPrice": 25.98, "price": 19.49, "sale":true, "percentage":"25%", "priceCurrency" : "GBP", "url" : "https://www.uk.plantura.garden/products/all-purpose-plant-food-1-5-kg?variant=37777826873507","isSet":true }, {"sku": "GF-APPF-A06K","available": true, "compareAtPriceString": "£51.96", "priceString": "£37.99", "compareAtPrice": 51.96, "price": 37.99, "sale":true, "percentage":"27%", "priceCurrency" : "GBP", "url" : "https://www.uk.plantura.garden/products/all-purpose-plant-food-1-5-kg?variant=37777826906275","isSet":true }, {"sku": "GF-APPF-A12K","available": false, "compareAtPriceString": "£103.92", "priceString": "£69.99", "compareAtPrice": 103.92, "price": 69.99, "sale":true, "percentage":"33%", "priceCurrency" : "GBP", "url" : "https://www.uk.plantura.garden/products/all-purpose-plant-food-1-5-kg?variant=37777826939043","isSet":true }], "handle" : "all-purpose-plant-food-1-5-kg"}, { "name": "Autumn Lawn Feed 10.5kg, 200m2 coverage", "unitPrice" : "Base price: £2.86/kg", "compareAtPriceString": "", "priceString": "£29.99", "compareAtPrice": 0.0, "price": 29.99, "sale":false, "percentage":"", "badge": "angebot", "url": "https://www.uk.plantura.garden/products/autumn-lawn-feed-10-5-kg", "available": true, "availabilityInfo":"", "campaignInfo":"","isSet": false, "priceLabel": "", "compareAtPriceLabel": "","reviewsData":{"reviewCount": 11, "reviewAverageValue": 4.4},"image": "https://www.uk.plantura.garden/cdn/shop/products/autumn-lawn-feed-10-5kg-plantura_1100x.jpg?v=1657620622","tags": "autumn,autumn fertiliser,granular fertiliser,Lawn,lawn care,plant fertiliser,potassium,slow release fertiliser,soil,spreader,turf,vinasse","bulletPoints": ["Perfect for fertilising lawns from July to October","Promotes a winter-hardy lawn \u0026 fast regeneration in spring","Long-lasting fertiliser that is free from animal products - child \u0026 pet friendly"],"variants" : [ {"sku": "GF-PALF-105K","available": true, "compareAtPriceString": "", "priceString": "£29.99", "compareAtPrice": 0.0, "price": 29.99, "sale":false, "percentage":"", "priceCurrency" : "GBP", "url" : "https://www.uk.plantura.garden/products/autumn-lawn-feed-10-5-kg?variant=37777824219299","isSet":false}, {"sku": "GF-PALF-21KG","available": true, "compareAtPriceString": "£59.98", "priceString": "£56.99", "compareAtPrice": 59.98, "price": 56.99, "sale":true, "percentage":"5%", "priceCurrency" : "GBP", "url" : "https://www.uk.plantura.garden/products/autumn-lawn-feed-10-5-kg?variant=37777824252067","isSet":true }, {"sku": "GF-PALF-42KG","available": true, "compareAtPriceString": "£119.96", "priceString": "£110.99", "compareAtPrice": 119.96, "price": 110.99, "sale":true, "percentage":"7%", "priceCurrency" : "GBP", "url" : "https://www.uk.plantura.garden/products/autumn-lawn-feed-10-5-kg?variant=37777824284835","isSet":true }], "handle" : "autumn-lawn-feed-10-5-kg"}, { "name": "Autumn Lawn Feed 3kg, 60m2 coverage", "unitPrice" : "", "compareAtPriceString": "", "priceString": "£14.99", "compareAtPrice": 0.0, "price": 14.99, "sale":false, "percentage":"", "badge": "angebot", "url": "https://www.uk.plantura.garden/products/autumn-lawn-feed-3-kg", "available": false, "availabilityInfo":"", "campaignInfo":"","isSet": false, "priceLabel": "", "compareAtPriceLabel": "","reviewsData":{"reviewCount": 8, "reviewAverageValue": 4.9},"image": "https://www.uk.plantura.garden/cdn/shop/products/autumn-lawn-feed-3kg-plantura_1100x.jpg?v=1657615883","tags": "autumn,autumn fertiliser,discount,granular fertiliser,Lawn,lawn care,plant fertiliser,potassium,sale,slow release fertiliser,soil,spreader,turf,vinasse","bulletPoints": ["Perfect for fertilising lawns from July to October","Promotes a winter-hardy lawn \u0026 fast regeneration in spring","Long-lasting fertiliser that is free from animal products - child \u0026 pet friendly"],"variants" : [ {"sku": "GF-PALF-A03K","available": false, "compareAtPriceString": "", "priceString": "£14.99", "compareAtPrice": 0.0, "price": 14.99, "sale":false, "percentage":"", "priceCurrency" : "GBP", "url" : "https://www.uk.plantura.garden/products/autumn-lawn-feed-3-kg?variant=37777828282531","isSet":false}, {"sku": "GF-PALF-A06K","available": false, "compareAtPriceString": "£29.98", "priceString": "£27.99", "compareAtPrice": 29.98, "price": 27.99, "sale":true, "percentage":"7%", "priceCurrency" : "GBP", "url" : "https://www.uk.plantura.garden/products/autumn-lawn-feed-3-kg?variant=37777828315299","isSet":true }], "handle" : "autumn-lawn-feed-3-kg"}, { "name": "Box Tree Moth Trap", "unitPrice" : "", "compareAtPriceString": "", "priceString": "£24.99", "compareAtPrice": 0.0, "price": 24.99, "sale":false, "percentage":"", "badge": "angebot", "url": "https://www.uk.plantura.garden/products/box-tree-moth-trap", "available": false, "availabilityInfo":"", "campaignInfo":"","isSet": false, "priceLabel": "", "compareAtPriceLabel": "","reviewsData":{"reviewCount": 3, "reviewAverageValue": 5.0},"image": "https://www.uk.plantura.garden/cdn/shop/products/box-tree-moth-trap-plantura_1100x.jpg?v=1657530999","tags": "box tree,box tree caterpillar,Box Tree Moth,pheromone trap","bulletPoints": ["Reusable pheromone trap for monitoring box tree moth activity","For the early detection of infestations - covers an area of up to 180m\u003csub\u003e2\u003c\/sub\u003e","100% insecticide-free - not harmful to humans or pets"],"variants" : [ {"sku": "MT-BTMT-RT01","available": false, "compareAtPriceString": "", "priceString": "£24.99", "compareAtPrice": 0.0, "price": 24.99, "sale":false, "percentage":"", "priceCurrency" : "GBP", "url" : "https://www.uk.plantura.garden/products/box-tree-moth-trap?variant=41520312058019","isSet":false}], "handle" : "box-tree-moth-trap"}, { "name": "Box Tree Moth Trap Refill 6 dispensers", "unitPrice" : "", "compareAtPriceString": "", "priceString": "£7.49", "compareAtPrice": 0.0, "price": 7.49, "sale":false, "percentage":"", "badge": "angebot", "url": "https://www.uk.plantura.garden/products/box-tree-moth-trap-refill", "available": true, "availabilityInfo":"", "campaignInfo":"","isSet": false, "priceLabel": "", "compareAtPriceLabel": "","reviewsData":{"reviewCount": 2, "reviewAverageValue": 2.5},"image": "https://www.uk.plantura.garden/cdn/shop/products/box-tree-moth-trap-refill-plantura_1100x.jpg?v=1657531158","tags": "box tree,box tree caterpillar,Box Tree Moth,pheromone trap","bulletPoints": ["6 dispensers for refilling our reusable Plantura Box Tree Moth Trap","Pheromone dispenser for attracting male box tree moths","100% insecticide free - not harmful to humans or pets"],"variants" : [ {"sku": "MT-BTMT-RD06","available": true, "compareAtPriceString": "", "priceString": "£7.49", "compareAtPrice": 0.0, "price": 7.49, "sale":false, "percentage":"", "priceCurrency" : "GBP", "url" : "https://www.uk.plantura.garden/products/box-tree-moth-trap-refill?variant=41520321429667","isSet":false}], "handle" : "box-tree-moth-trap-refill"}, { "name": "Clothes Moth Traps 6-pack", "unitPrice" : "", "compareAtPriceString": "", "priceString": "£9.99", "compareAtPrice": 0.0, "price": 9.99, "sale":false, "percentage":"", "badge": "angebot", "url": "https://www.uk.plantura.garden/products/clothes-moth-traps", "available": false, "availabilityInfo":"", "campaignInfo":"","isSet": false, "priceLabel": "", "compareAtPriceLabel": "","reviewsData":{"reviewCount": 7, "reviewAverageValue": 5.0},"image": "https://www.uk.plantura.garden/cdn/shop/products/clothes-moth-traps-plantura_1100x.jpg?v=1657532784","tags": "carpet moths,carpet moths traps,clothes moth traps,clothes moths,clothes moths pheromone traps,moth traps,pheromone traps,sticky traps","bulletPoints": ["6 odourless, long-lasting clothes moth traps ","Ideal for detecting infestations in wardrobes \u0026 storage rooms early on","100% insecticide-free \u0026 non-toxic"],"variants" : [ {"sku": "MT-CMT1-TW06","available": false, "compareAtPriceString": "", "priceString": "£9.99", "compareAtPrice": 0.0, "price": 9.99, "sale":false, "percentage":"", "priceCurrency" : "GBP", "url" : "https://www.uk.plantura.garden/products/clothes-moth-traps?variant=42646008299683","isSet":false}], "handle" : "clothes-moth-traps"}, { "name": "Drought-Resistant Lawn Seed, 2kg, 80m2 coverage", "unitPrice" : "Base price: £12.50/kg", "compareAtPriceString": "£29.99", "priceString": "£24.99", "compareAtPrice": 29.99, "price": 24.99, "sale":false, "percentage":"17%", "badge": "angebot", "url": "https://www.uk.plantura.garden/products/drought-resistant-lawn-seed-2-kg", "available": true, "availabilityInfo":"", "campaignInfo":"","isSet": false, "priceLabel": "", "compareAtPriceLabel": "","reviewsData":{"reviewCount": 2, "reviewAverageValue": 4.5},"image": "https://www.uk.plantura.garden/cdn/shop/products/drought-resistant-lawn-seed-plantura_1100x.jpg?v=1657716694","tags": "angebot,grass seed,grasses,Lawn,lawn seed,meadow,New Lawn,rsm,seed,seeds,soil,sowing,spreader","bulletPoints": ["Perfect for regions with hot \u0026 dry summers","Saves water with heat-tolerant \u0026 deep-rooted grasses","Premium lawn seed mixture with high-quality, certified grass varieties"],"variants" : [ {"sku": "LS-PDRL-02KG","available": true, "compareAtPriceString": "£29.99", "priceString": "£24.99", "compareAtPrice": 29.99, "price": 24.99, "sale":true, "percentage":"17%", "priceCurrency" : "GBP", "url" : "https://www.uk.plantura.garden/products/drought-resistant-lawn-seed-2-kg?variant=37777803018403","isSet":false}, {"sku": "LS-PDRL-04KG","available": true, "compareAtPriceString": "£59.98", "priceString": "£44.99", "compareAtPrice": 59.98, "price": 44.99, "sale":true, "percentage":"25%", "priceCurrency" : "GBP", "url" : "https://www.uk.plantura.garden/products/drought-resistant-lawn-seed-2-kg?variant=37777803051171","isSet":true }, {"sku": "LS-PDRL-10KG","available": true, "compareAtPriceString": "£149.95", "priceString": "£99.99", "compareAtPrice": 149.95, "price": 99.99, "sale":true, "percentage":"33%", "priceCurrency" : "GBP", "url" : "https://www.uk.plantura.garden/products/drought-resistant-lawn-seed-2-kg?variant=37777803116707","isSet":true }], "handle" : "drought-resistant-lawn-seed-2-kg"}, { "name": "Flower Food, 1.5kg", "unitPrice" : "Base price: £6.66/kg", "compareAtPriceString": "£12.99", "priceString": "£9.99", "compareAtPrice": 12.99, "price": 9.99, "sale":false, "percentage":"23%", "badge": "angebot", "url": "https://www.uk.plantura.garden/products/flower-food-1-5-kg", "available": true, "availabilityInfo":"", "campaignInfo":"","isSet": false, "priceLabel": "", "compareAtPriceLabel": "","reviewsData":null,"image": "https://www.uk.plantura.garden/cdn/shop/products/plantura-flower-food_1100x.jpg?v=1656336129","tags": "angebot,clematis,flowering plants,Flowers,fuchsia,garden flowers,geranium,granular fertiliser,hibiscus,lily,oleander,passion flower,peony,petunia,plant fertiliser,slow release fertiliser,vinasse","bulletPoints": ["Perfect for flowering plants in the garden \u0026 on the balcony","For healthier plants with beautiful \u0026 long-lasting blossoms","Long-lasting fertiliser that is free from animal products - child \u0026 pet friendly"],"variants" : [ {"sku": "GF-PFF1-F15K","available": true, "compareAtPriceString": "£12.99", "priceString": "£9.99", "compareAtPrice": 12.99, "price": 9.99, "sale":true, "percentage":"23%", "priceCurrency" : "GBP", "url" : "https://www.uk.plantura.garden/products/flower-food-1-5-kg?variant=37777827528867","isSet":false}, {"sku": "GF-PFF1-F03K","available": true, "compareAtPriceString": "£25.98", "priceString": "£19.49", "compareAtPrice": 25.98, "price": 19.49, "sale":true, "percentage":"25%", "priceCurrency" : "GBP", "url" : "https://www.uk.plantura.garden/products/flower-food-1-5-kg?variant=37777827561635","isSet":true }, {"sku": "GF-PFF1-F06K","available": true, "compareAtPriceString": "£51.96", "priceString": "£37.99", "compareAtPrice": 51.96, "price": 37.99, "sale":true, "percentage":"27%", "priceCurrency" : "GBP", "url" : "https://www.uk.plantura.garden/products/flower-food-1-5-kg?variant=37777827627171","isSet":true }, {"sku": "GF-PFF1-F12K","available": true, "compareAtPriceString": "£103.92", "priceString": "£69.99", "compareAtPrice": 103.92, "price": 69.99, "sale":true, "percentage":"33%", "priceCurrency" : "GBP", "url" : "https://www.uk.plantura.garden/products/flower-food-1-5-kg?variant=37777827659939","isSet":true }], "handle" : "flower-food-1-5-kg"}, { "name": "Hard-Wearing Lawn Seed, 2kg, 100m2 coverage", "unitPrice" : "Base price: £10.00/kg", "compareAtPriceString": "£25.99", "priceString": "£19.99", "compareAtPrice": 25.99, "price": 19.99, "sale":false, "percentage":"23%", "badge": "angebot", "url": "https://www.uk.plantura.garden/products/hard-wearing-lawn-seed-2-kg", "available": true, "availabilityInfo":"", "campaignInfo":"","isSet": false, "priceLabel": "", "compareAtPriceLabel": "","reviewsData":{"reviewCount": 1, "reviewAverageValue": 5.0},"image": "https://www.uk.plantura.garden/cdn/shop/products/hard-wearing-lawn-seed-plantura_1100x.jpg?v=1657796876","tags": "angebot,children,grass seed,grasses,Lawn,lawn seed,meadow,New Lawn,rsm,seed,seeds,soil,sowing,sports turf,spreader,tough lawn","bulletPoints": ["Creates particularly strong \u0026 durable lawns","Contains regenerative lawn seeds for thick turf","Premium lawn seed mixture with high-quality, certified grass varieties"],"variants" : [ {"sku": "LS-PHWL-02KG","available": true, "compareAtPriceString": "£25.99", "priceString": "£19.99", "compareAtPrice": 25.99, "price": 19.99, "sale":true, "percentage":"23%", "priceCurrency" : "GBP", "url" : "https://www.uk.plantura.garden/products/hard-wearing-lawn-seed-2-kg?variant=37777804951715","isSet":false}, {"sku": "LS-PHWL-04KG","available": true, "compareAtPriceString": "£51.98", "priceString": "£37.99", "compareAtPrice": 51.98, "price": 37.99, "sale":true, "percentage":"27%", "priceCurrency" : "GBP", "url" : "https://www.uk.plantura.garden/products/hard-wearing-lawn-seed-2-kg?variant=37777804984483","isSet":true }, {"sku": "LS-PHWL-10KG","available": true, "compareAtPriceString": "£129.95", "priceString": "£79.99", "compareAtPrice": 129.95, "price": 79.99, "sale":true, "percentage":"38%", "priceCurrency" : "GBP", "url" : "https://www.uk.plantura.garden/products/hard-wearing-lawn-seed-2-kg?variant=37777805017251","isSet":true }], "handle" : "hard-wearing-lawn-seed-2-kg"}, { "name": "Hydrangea Food, 1.5kg", "unitPrice" : "Base price: £8.66/kg", "compareAtPriceString": "", "priceString": "£12.99", "compareAtPrice": 0.0, "price": 12.99, "sale":false, "percentage":"", "badge": "angebot", "url": "https://www.uk.plantura.garden/products/hydrangea-food-1-5-kg", "available": true, "availabilityInfo":"", "campaignInfo":"","isSet": false, "priceLabel": "", "compareAtPriceLabel": "","reviewsData":{"reviewCount": 5, "reviewAverageValue": 5.0},"image": "https://www.uk.plantura.garden/cdn/shop/products/plantura-hydrangea-food_1100x.jpg?v=1656337945","tags": "azalea,ericaceous fertiliser,Flowers,granular fertiliser,hydrangea arborescens,hydrangea macrophylla,hydrangea paniculata,hydrangea petiolaris,hydrangea serrata,Hydrangeas,plant fertiliser,rhododendron,slow release fertiliser,vinasse","bulletPoints": ["For beautiful hydrangeas with lush blooms in pots \u0026 flower beds","Prevents common deficiency symptoms \u0026 supports healthy plant growth","Long-lasting fertiliser that is free from animal products - child \u0026 pet friendly"],"variants" : [ {"sku": "GF-PHF1-H15K","available": true, "compareAtPriceString": "", "priceString": "£12.99", "compareAtPrice": 0.0, "price": 12.99, "sale":false, "percentage":"", "priceCurrency" : "GBP", "url" : "https://www.uk.plantura.garden/products/hydrangea-food-1-5-kg?variant=37777820614819","isSet":false}, {"sku": "GF-PHF1-H03K","available": true, "compareAtPriceString": "£25.98", "priceString": "£24.99", "compareAtPrice": 25.98, "price": 24.99, "sale":true, "percentage":"4%", "priceCurrency" : "GBP", "url" : "https://www.uk.plantura.garden/products/hydrangea-food-1-5-kg?variant=37777820647587","isSet":true }, {"sku": "GF-PHF1-H06K","available": true, "compareAtPriceString": "£51.96", "priceString": "£47.99", "compareAtPrice": 51.96, "price": 47.99, "sale":true, "percentage":"8%", "priceCurrency" : "GBP", "url" : "https://www.uk.plantura.garden/products/hydrangea-food-1-5-kg?variant=37777820680355","isSet":true }, {"sku": "GF-PHF1-H12K","available": true, "compareAtPriceString": "£103.92", "priceString": "£93.99", "compareAtPrice": 103.92, "price": 93.99, "sale":true, "percentage":"10%", "priceCurrency" : "GBP", "url" : "https://www.uk.plantura.garden/products/hydrangea-food-1-5-kg?variant=37777820713123","isSet":true }], "handle" : "hydrangea-food-1-5-kg"}, { "name": "Lawn Feed 10.5kg, 250m2 coverage", "unitPrice" : "Base price: £2.28/kg", "compareAtPriceString": "£29.99", "priceString": "£23.99", "compareAtPrice": 29.99, "price": 23.99, "sale":false, "percentage":"20%", "badge": "angebot", "url": "https://www.uk.plantura.garden/products/lawn-feed-10-5-kg", "available": true, "availabilityInfo":"", "campaignInfo":"","isSet": false, "priceLabel": "", "compareAtPriceLabel": "","reviewsData":{"reviewCount": 4, "reviewAverageValue": 5.0},"image": "https://www.uk.plantura.garden/cdn/shop/products/lawn-feed-10-5kg-plantura_1100x.jpg?v=1657613812","tags": "angebot,granular fertiliser,Lawn,lawn care,nitrogen fertiliser,plant fertiliser,Rasendünger,Rasenrelevant (ohne Herbstrasen),slow release fertiliser,soil,spreader,turf,vinasse","bulletPoints": ["Perfect for a healthy \u0026 lush green lawn without moss","Supports your lawn with all the nutrients it needs in spring \u0026 summer","Long-lasting fertiliser that is free from animal products - child \u0026 pet friendly"],"variants" : [ {"sku": "GF-PLF3-105K","available": true, "compareAtPriceString": "£29.99", "priceString": "£23.99", "compareAtPrice": 29.99, "price": 23.99, "sale":true, "percentage":"20%", "priceCurrency" : "GBP", "url" : "https://www.uk.plantura.garden/products/lawn-feed-10-5-kg?variant=37777822941347","isSet":false}, {"sku": "GF-PLF3-21KG","available": true, "compareAtPriceString": "£59.98", "priceString": "£44.99", "compareAtPrice": 59.98, "price": 44.99, "sale":true, "percentage":"25%", "priceCurrency" : "GBP", "url" : "https://www.uk.plantura.garden/products/lawn-feed-10-5-kg?variant=37777823006883","isSet":true }, {"sku": "GF-PLF3-42KG","available": true, "compareAtPriceString": "£119.96", "priceString": "£79.99", "compareAtPrice": 119.96, "price": 79.99, "sale":true, "percentage":"33%", "priceCurrency" : "GBP", "url" : "https://www.uk.plantura.garden/products/lawn-feed-10-5-kg?variant=37777823039651","isSet":true }], "handle" : "lawn-feed-10-5-kg"}, { "name": "Lawn Feed 3kg, 70m2 coverage", "unitPrice" : "Base price: £3.00/kg", "compareAtPriceString": "£14.99", "priceString": "£8.99", "compareAtPrice": 14.99, "price": 8.99, "sale":false, "percentage":"40%", "badge": "angebot", "url": "https://www.uk.plantura.garden/products/lawn-feed-3-kg", "available": true, "availabilityInfo":"", "campaignInfo":"","isSet": false, "priceLabel": "", "compareAtPriceLabel": "","reviewsData":{"reviewCount": 2, "reviewAverageValue": 5.0},"image": "https://www.uk.plantura.garden/cdn/shop/products/lawn-feed-3kg-plantura_1100x.jpg?v=1657612205","tags": "angebot,granular fertiliser,Lawn,lawn care,nitrogen fertiliser,plant fertiliser,Rasenrelevant (ohne Herbstrasen),slow release fertiliser,soil,spreader,turf,vinasse","bulletPoints": ["Perfect for a healthy \u0026 lush green lawn without moss","Supports your lawn with all the nutrients it needs in spring \u0026 summer","Long-lasting fertiliser that is free from animal products - child \u0026 pet friendly"],"variants" : [ {"sku": "GF-PLF1-L03K","available": true, "compareAtPriceString": "£14.99", "priceString": "£8.99", "compareAtPrice": 14.99, "price": 8.99, "sale":true, "percentage":"40%", "priceCurrency" : "GBP", "url" : "https://www.uk.plantura.garden/products/lawn-feed-3-kg?variant=37777828905123","isSet":false}, {"sku": "GF-PLF1-L06K","available": true, "compareAtPriceString": "£29.98", "priceString": "£16.99", "compareAtPrice": 29.98, "price": 16.99, "sale":true, "percentage":"43%", "priceCurrency" : "GBP", "url" : "https://www.uk.plantura.garden/products/lawn-feed-3-kg?variant=37777828937891","isSet":true }], "handle" : "lawn-feed-3-kg"}, { "name": "Lawn Overseeding Mix, 2kg, 100m2", "unitPrice" : "Base price: £10.00/kg", "compareAtPriceString": "£25.99", "priceString": "£19.99", "compareAtPrice": 25.99, "price": 19.99, "sale":false, "percentage":"23%", "badge": "angebot", "url": "https://www.uk.plantura.garden/products/lawn-overseeding-mix-2-kg", "available": true, "availabilityInfo":"", "campaignInfo":"","isSet": false, "priceLabel": "", "compareAtPriceLabel": "","reviewsData":{"reviewCount": 9, "reviewAverageValue": 4.9},"image": "https://www.uk.plantura.garden/cdn/shop/products/lawn-overseeding-mix-2-kg-plantura_1100x.jpg?v=1657627004","tags": "angebot,grass seed,grasses,Lawn,lawn care,lawn seed,meadow,repair,reseeding,rsm,seed,seeds,soil,spreader,Thin Lawn","bulletPoints": ["Perfect for fixing thinning \u0026 weedy lawns","Repairs lawns quickly \u0026 reliably - for lush green grass","High-quality, certified grass varieties \u0026 coated seeds"],"variants" : [ {"sku": "LS-PLOM-02KG","available": true, "compareAtPriceString": "£25.99", "priceString": "£19.99", "compareAtPrice": 25.99, "price": 19.99, "sale":true, "percentage":"23%", "priceCurrency" : "GBP", "url" : "https://www.uk.plantura.garden/products/lawn-overseeding-mix-2-kg?variant=37777799938211","isSet":false}, {"sku": "LS-PLOM-04KG","available": true, "compareAtPriceString": "£51.98", "priceString": "£37.99", "compareAtPrice": 51.98, "price": 37.99, "sale":true, "percentage":"27%", "priceCurrency" : "GBP", "url" : "https://www.uk.plantura.garden/products/lawn-overseeding-mix-2-kg?variant=37777799970979","isSet":true }, {"sku": "LS-PLOM-10KG","available": true, "compareAtPriceString": "£129.95", "priceString": "£79.99", "compareAtPrice": 129.95, "price": 79.99, "sale":true, "percentage":"38%", "priceCurrency" : "GBP", "url" : "https://www.uk.plantura.garden/products/lawn-overseeding-mix-2-kg?variant=37777800003747","isSet":true }], "handle" : "lawn-overseeding-mix-2-kg"}, { "name": "Lawn Overseeding Mix,1kg, 50m2", "unitPrice" : "Base price: £16.99/kg", "compareAtPriceString": "", "priceString": "£16.99", "compareAtPrice": 0.0, "price": 16.99, "sale":false, "percentage":"", "badge": "angebot", "url": "https://www.uk.plantura.garden/products/lawn-overseeding-mix-1kg", "available": true, "availabilityInfo":"", "campaignInfo":"","isSet": false, "priceLabel": "", "compareAtPriceLabel": "","reviewsData":{"reviewCount": 1, "reviewAverageValue": 5.0},"image": "https://www.uk.plantura.garden/cdn/shop/products/lawn-overseeding-mix-1-kg-plantura_1200x.jpg?v=1657702293","tags": "grass seed,grasses,Lawn,lawn care,lawn seed,meadow,repair,reseeding,rsm,seed,seeds,soil,spreader,Thin Lawn","bulletPoints": ["Perfect for fixing thinning \u0026 weedy lawns","Repairs lawns quickly \u0026 reliably - for lush green grass","High-quality, certified grass varieties \u0026 coated seeds"],"variants" : [ {"sku": "LS-PLOM-01KG","available": true, "compareAtPriceString": "", "priceString": "£16.99", "compareAtPrice": 0.0, "price": 16.99, "sale":false, "percentage":"", "priceCurrency" : "GBP", "url" : "https://www.uk.plantura.garden/products/lawn-overseeding-mix-1kg?variant=37777801412771","isSet":false}], "handle" : "lawn-overseeding-mix-1kg"}, { "name": "Lawn Repair Mix, 1.5kg, 10m2 coverage", "unitPrice" : "Base price: £8.66/kg", "compareAtPriceString": "£16.99", "priceString": "£12.99", "compareAtPrice": 16.99, "price": 12.99, "sale":false, "percentage":"24%", "badge": "angebot", "url": "https://www.uk.plantura.garden/products/lawn-repair-mix-1-5-kg", "available": true, "availabilityInfo":"", "campaignInfo":"","isSet": false, "priceLabel": "", "compareAtPriceLabel": "","reviewsData":{"reviewCount": 5, "reviewAverageValue": 4.8},"image": "https://www.uk.plantura.garden/cdn/shop/products/lawn-repair-mix-plantura_1100x.jpg?v=1657877879","tags": "angebot,grass seed,grasses,Lawn,lawn care,lawn seed,meadow,overseeding,patchy grass,Patchy Lawn,reseeding,rsm,seed,seeds,soil,spreader","bulletPoints": ["Repairs patches in the lawn quickly \u0026 reliably","With fertiliser and lime for a greener \u0026 thicker lawn","Premium lawn seed mixture with high-quality, certified grass varieties"],"variants" : [ {"sku": "LS-PLRM-015G","available": true, "compareAtPriceString": "£16.99", "priceString": "£12.99", "compareAtPrice": 16.99, "price": 12.99, "sale":true, "percentage":"24%", "priceCurrency" : "GBP", "url" : "https://www.uk.plantura.garden/products/lawn-repair-mix-1-5-kg?variant=37777802002595","isSet":false}, {"sku": "LS-PLRM-03KG","available": true, "compareAtPriceString": "£33.98", "priceString": "£24.99", "compareAtPrice": 33.98, "price": 24.99, "sale":true, "percentage":"26%", "priceCurrency" : "GBP", "url" : "https://www.uk.plantura.garden/products/lawn-repair-mix-1-5-kg?variant=37777802035363","isSet":true }, {"sku": "LS-PLRM-06KG","available": true, "compareAtPriceString": "£67.96", "priceString": "£44.99", "compareAtPrice": 67.96, "price": 44.99, "sale":true, "percentage":"34%", "priceCurrency" : "GBP", "url" : "https://www.uk.plantura.garden/products/lawn-repair-mix-1-5-kg?variant=37777802068131","isSet":true }], "handle" : "lawn-repair-mix-1-5-kg"}, { "name": "Liquid Citrus Food, 800ml", "unitPrice" : "", "compareAtPriceString": "", "priceString": "£10.99", "compareAtPrice": 0.0, "price": 10.99, "sale":false, "percentage":"", "badge": "angebot", "url": "https://www.uk.plantura.garden/products/liquid-citrus-food-800-ml", "available": false, "availabilityInfo":"", "campaignInfo":"","isSet": false, "priceLabel": "", "compareAtPriceLabel": "","reviewsData":{"reviewCount": 8, "reviewAverageValue": 4.9},"image": "https://www.uk.plantura.garden/cdn/shop/products/liquid-citrus-food-plantura_1100x.jpg?v=1657542983","tags": "citrus plants,CitrusMediterraneanplants,clementine,fig,grapefruit,kumquat,lemon,lemon tree,lime,liquid fertiliser,mandarin,mediterranean plants,olive,olive tree,orange,palm tree,palm tree fertiliser,plant fertiliser,vinasse","bulletPoints": ["Perfect for all citrus plants \u0026 Mediterranean plants","Liquid fertiliser for healthy plants \u0026 aromatic fruit","Quick \u0026 easy application - child \u0026 pet friendly"],"variants" : [ {"sku": "LF-LCF1-C80M","available": false, "compareAtPriceString": "", "priceString": "£10.99", "compareAtPrice": 0.0, "price": 10.99, "sale":false, "percentage":"", "priceCurrency" : "GBP", "url" : "https://www.uk.plantura.garden/products/liquid-citrus-food-800-ml?variant=37777795973283","isSet":false}, {"sku": "LF-LCF1-C16L","available": false, "compareAtPriceString": "£21.98", "priceString": "£20.99", "compareAtPrice": 21.98, "price": 20.99, "sale":true, "percentage":"5%", "priceCurrency" : "GBP", "url" : "https://www.uk.plantura.garden/products/liquid-citrus-food-800-ml?variant=37777796006051","isSet":true }, {"sku": "LF-LCF1-C32L","available": false, "compareAtPriceString": "£43.96", "priceString": "£40.99", "compareAtPrice": 43.96, "price": 40.99, "sale":true, "percentage":"7%", "priceCurrency" : "GBP", "url" : "https://www.uk.plantura.garden/products/liquid-citrus-food-800-ml?variant=37777796038819","isSet":true }, {"sku": "LF-LCF1-C96L","available": false, "compareAtPriceString": "£131.88", "priceString": "£119.99", "compareAtPrice": 131.88, "price": 119.99, "sale":true, "percentage":"9%", "priceCurrency" : "GBP", "url" : "https://www.uk.plantura.garden/products/liquid-citrus-food-800-ml?variant=37777796071587","isSet":true }], "handle" : "liquid-citrus-food-800-ml"}, { "name": "Liquid Flower Food, 800ml", "unitPrice" : "Base price: £13.74/l", "compareAtPriceString": "", "priceString": "£10.99", "compareAtPrice": 0.0, "price": 10.99, "sale":false, "percentage":"", "badge": "angebot", "url": "https://www.uk.plantura.garden/products/liquid-flower-food-800-ml", "available": true, "availabilityInfo":"", "campaignInfo":"","isSet": false, "priceLabel": "", "compareAtPriceLabel": "","reviewsData":{"reviewCount": 1, "reviewAverageValue": 5.0},"image": "https://www.uk.plantura.garden/cdn/shop/products/liquid-flower-food-plantura_1100x.jpg?v=1657542082","tags": "balcony flowers,clematis,FlowerBalconyplants,flowering plants,Flowers,fuchsia,geranium,hibiscus,lily,liquid fertiliser,oleander,passion flower,peony,petunia,plant fertiliser,vinasse","bulletPoints": ["Perfect for all flowers \u0026 balcony plants","Liquid fertiliser for a lush blossom throughout the season","Quick \u0026 easy application - child \u0026 pet friendly"],"variants" : [ {"sku": "LF-LFF1-F80M","available": true, "compareAtPriceString": "", "priceString": "£10.99", "compareAtPrice": 0.0, "price": 10.99, "sale":false, "percentage":"", "priceCurrency" : "GBP", "url" : "https://www.uk.plantura.garden/products/liquid-flower-food-800-ml?variant=37777796530339","isSet":false}, {"sku": "LF-LFF1-F16L","available": true, "compareAtPriceString": "£21.98", "priceString": "£20.99", "compareAtPrice": 21.98, "price": 20.99, "sale":true, "percentage":"5%", "priceCurrency" : "GBP", "url" : "https://www.uk.plantura.garden/products/liquid-flower-food-800-ml?variant=37777796563107","isSet":true }, {"sku": "LF-LFF1-F32L","available": true, "compareAtPriceString": "£43.96", "priceString": "£40.99", "compareAtPrice": 43.96, "price": 40.99, "sale":true, "percentage":"7%", "priceCurrency" : "GBP", "url" : "https://www.uk.plantura.garden/products/liquid-flower-food-800-ml?variant=37777796595875","isSet":true }, {"sku": "LF-LFF1-F96L","available": true, "compareAtPriceString": "£131.88", "priceString": "£119.99", "compareAtPrice": 131.88, "price": 119.99, "sale":true, "percentage":"9%", "priceCurrency" : "GBP", "url" : "https://www.uk.plantura.garden/products/liquid-flower-food-800-ml?variant=37777796628643","isSet":true }], "handle" : "liquid-flower-food-800-ml"}, { "name": "Liquid Houseplant Food, 800ml", "unitPrice" : "", "compareAtPriceString": "£10.99", "priceString": "£8.99", "compareAtPrice": 10.99, "price": 8.99, "sale":true, "percentage":"18%", "badge": "angebot", "url": "https://www.uk.plantura.garden/products/liquid-houseplant-food-800-ml", "available": false, "availabilityInfo":"", "campaignInfo":"","isSet": false, "priceLabel": "", "compareAtPriceLabel": "","reviewsData":{"reviewCount": 7, "reviewAverageValue": 5.0},"image": "https://www.uk.plantura.garden/cdn/shop/products/liquid-houseplant-food-plantura_1100x.jpg?v=1657542279","tags": "angebot,box tree,cactus,Herbs,Houseplants,indoor plant,liquid fertiliser,monstera,palm tree,plant fertiliser,pot,succulent,vinasse","bulletPoints": ["Perfect for a wide variety of houseplants \u0026 foliage plants","Liquid fertiliser for robust plants \u0026 healthy growth","Quick \u0026 easy application - child \u0026 pet friendly"],"variants" : [ {"sku": "LF-LHF1-H80M","available": false, "compareAtPriceString": "£10.99", "priceString": "£8.99", "compareAtPrice": 10.99, "price": 8.99, "sale":true, "percentage":"18%", "priceCurrency" : "GBP", "url" : "https://www.uk.plantura.garden/products/liquid-houseplant-food-800-ml?variant=37777795088547","isSet":false}, {"sku": "LF-LHF1-H16L","available": false, "compareAtPriceString": "£21.98", "priceString": "£16.99", "compareAtPrice": 21.98, "price": 16.99, "sale":true, "percentage":"23%", "priceCurrency" : "GBP", "url" : "https://www.uk.plantura.garden/products/liquid-houseplant-food-800-ml?variant=37777795154083","isSet":true }, {"sku": "LF-LHF1-H32L","available": false, "compareAtPriceString": "£43.96", "priceString": "£32.99", "compareAtPrice": 43.96, "price": 32.99, "sale":true, "percentage":"25%", "priceCurrency" : "GBP", "url" : "https://www.uk.plantura.garden/products/liquid-houseplant-food-800-ml?variant=37777795186851","isSet":true }, {"sku": "LF-LHF1-H96L","available": false, "compareAtPriceString": "£131.88", "priceString": "£96.99", "compareAtPrice": 131.88, "price": 96.99, "sale":true, "percentage":"26%", "priceCurrency" : "GBP", "url" : "https://www.uk.plantura.garden/products/liquid-houseplant-food-800-ml?variant=37777795219619","isSet":true }], "handle" : "liquid-houseplant-food-800-ml"}, { "name": "Liquid Tomato Food, 800ml", "unitPrice" : "Base price: £11.24/l", "compareAtPriceString": "£10.99", "priceString": "£8.99", "compareAtPrice": 10.99, "price": 8.99, "sale":false, "percentage":"18%", "badge": "angebot", "url": "https://www.uk.plantura.garden/products/liquid-tomato-food-800-ml", "available": true, "availabilityInfo":"", "campaignInfo":"","isSet": false, "priceLabel": "", "compareAtPriceLabel": "","reviewsData":{"reviewCount": 1, "reviewAverageValue": 5.0},"image": "https://www.uk.plantura.garden/cdn/shop/products/liquid-tomato-food-plantura_1100x.jpg?v=1657542588","tags": "angebot,aubergine,bean,berry fertiliser,carrot,cauliflower,chili,chilli,courgette,cucumber,garlic,liquid fertiliser,onion,pepper,plant fertiliser,potassium,potato,pumpkin,radish,rhubarb,strawberry,Tomatoes,vegetable,Vegetables,vinasse","bulletPoints": ["Perfect for tomatoes \u0026 other vegetables","Liquid fertiliser for healthy plant growth \u0026 an abundant harvest","Quick \u0026 easy application - child \u0026 pet friendly"],"variants" : [ {"sku": "LF-LTF1-T80M","available": true, "compareAtPriceString": "£10.99", "priceString": "£8.99", "compareAtPrice": 10.99, "price": 8.99, "sale":true, "percentage":"18%", "priceCurrency" : "GBP", "url" : "https://www.uk.plantura.garden/products/liquid-tomato-food-800-ml?variant=37777795580067","isSet":false}, {"sku": "LF-LTF1-T16L","available": true, "compareAtPriceString": "£21.98", "priceString": "£16.99", "compareAtPrice": 21.98, "price": 16.99, "sale":true, "percentage":"23%", "priceCurrency" : "GBP", "url" : "https://www.uk.plantura.garden/products/liquid-tomato-food-800-ml?variant=37777795612835","isSet":true }, {"sku": "LF-LTF1-T32L","available": true, "compareAtPriceString": "£43.96", "priceString": "£32.99", "compareAtPrice": 43.96, "price": 32.99, "sale":true, "percentage":"25%", "priceCurrency" : "GBP", "url" : "https://www.uk.plantura.garden/products/liquid-tomato-food-800-ml?variant=37777795645603","isSet":true }, {"sku": "LF-LTF1-T96L","available": true, "compareAtPriceString": "£131.88", "priceString": "£96.99", "compareAtPrice": 131.88, "price": 96.99, "sale":true, "percentage":"26%", "priceCurrency" : "GBP", "url" : "https://www.uk.plantura.garden/products/liquid-tomato-food-800-ml?variant=37777795678371","isSet":true }], "handle" : "liquid-tomato-food-800-ml"}, { "name": "Mini-Wasps against Clothes Moths - Natural Moth Control", "unitPrice" : "", "compareAtPriceString": "", "priceString": "£39.99", "compareAtPrice": 0.0, "price": 39.99, "sale":false, "percentage":"", "badge": "angebot", "url": "https://www.uk.plantura.garden/products/mini-wasps-against-clothes-moths", "available": false, "availabilityInfo":"Back in stock soon", "campaignInfo":"","isSet": false, "priceLabel": "", "compareAtPriceLabel": "","reviewsData":{"reviewCount": 6, "reviewAverageValue": 4.2},"image": "https://www.uk.plantura.garden/cdn/shop/products/mini-wasps-against-clothes-moths-plantura_1000x.png?v=1667393583","tags": "beneficial bugs,Beneficial insects,Cards,clothes moths,Ichneumon wasps,insects,mini-wasps,parasitic wasps,Trichogramma wasps","bulletPoints": ["Effective \u0026 chemical-free biological control for clothes moths","1 one-time payment for 6 separate lots of mini-wasp cards delivered at 2 week intervals","Highest quality parasitic wasps - not harmful to humans or pets"],"variants" : [ {"sku": "MW-CMMC-002C","available": false, "compareAtPriceString": "", "priceString": "£39.99", "compareAtPrice": 0.0, "price": 39.99, "sale":false, "percentage":"", "priceCurrency" : "GBP", "url" : "https://www.uk.plantura.garden/products/mini-wasps-against-clothes-moths?variant=43028154777763","isSet":false}, {"sku": "MW-CMMC-003C","available": false, "compareAtPriceString": "£59.99", "priceString": "£54.99", "compareAtPrice": 59.99, "price": 54.99, "sale":true, "percentage":"8%", "priceCurrency" : "GBP", "url" : "https://www.uk.plantura.garden/products/mini-wasps-against-clothes-moths?variant=43028154810531","isSet":true }, {"sku": "MW-CMMC-004C","available": false, "compareAtPriceString": "£79.98", "priceString": "£64.99", "compareAtPrice": 79.98, "price": 64.99, "sale":true, "percentage":"19%", "priceCurrency" : "GBP", "url" : "https://www.uk.plantura.garden/products/mini-wasps-against-clothes-moths?variant=43028154843299","isSet":true }, {"sku": "MW-CMMC-006C","available": false, "compareAtPriceString": "£119.97", "priceString": "£94.99", "compareAtPrice": 119.97, "price": 94.99, "sale":true, "percentage":"21%", "priceCurrency" : "GBP", "url" : "https://www.uk.plantura.garden/products/mini-wasps-against-clothes-moths?variant=43028154876067","isSet":true }, {"sku": "MW-CMMC-008C","available": false, "compareAtPriceString": "£159.96", "priceString": "£114.99", "compareAtPrice": 159.96, "price": 114.99, "sale":true, "percentage":"28%", "priceCurrency" : "GBP", "url" : "https://www.uk.plantura.garden/products/mini-wasps-against-clothes-moths?variant=43028154908835","isSet":true }, {"sku": "MW-CMMC-010C","available": false, "compareAtPriceString": "£199.95", "priceString": "£139.99", "compareAtPrice": 199.95, "price": 139.99, "sale":true, "percentage":"30%", "priceCurrency" : "GBP", "url" : "https://www.uk.plantura.garden/products/mini-wasps-against-clothes-moths?variant=43028154941603","isSet":true }], "handle" : "mini-wasps-against-clothes-moths"}, { "name": "Mini-Wasps against Pantry Moths - Natural Moth Control", "unitPrice" : "", "compareAtPriceString": "", "priceString": "£0.00", "compareAtPrice": 0.0, "price": 0.0, "sale":false, "percentage":"", "badge": "new", "url": "https://www.uk.plantura.garden/products/mini-wasps-against-pantry-moths", "available": false, "availabilityInfo":"Back in stock soon", "campaignInfo":"","isSet": false, "priceLabel": "", "compareAtPriceLabel": "","reviewsData":{"reviewCount": 4, "reviewAverageValue": 5.0},"image": "https://www.uk.plantura.garden/cdn/shop/products/mini-wasps-against-pantry-moths-plantura_1000x.png?v=1667391785","tags": "Beneficial insects,cacao moths,Cards,Ichneumon wasps,Indianmeal moths,Insects,Mediterranean flour moth,Moth wasps,new,pantry moths,Parasitic moths,Trichogramma wasps","bulletPoints": ["Effective \u0026 chemical-free biological control for pantry moths","1 one-time payment for 4 separate lots of mini-wasp cards delivered at 2 week intervals","Highest quality parasitic wasps - not harmful to humans or pets"],"variants" : [ {"sku": "MW-PMMC-002C","available": false, "compareAtPriceString": "", "priceString": "£0.00", "compareAtPrice": 0.0, "price": 0.0, "sale":false, "percentage":"", "priceCurrency" : "GBP", "url" : "https://www.uk.plantura.garden/products/mini-wasps-against-pantry-moths?variant=43028075577507","isSet":false}, {"sku": "MW-PMMC-003C","available": false, "compareAtPriceString": "£35.99", "priceString": "£32.99", "compareAtPrice": 35.99, "price": 32.99, "sale":true, "percentage":"8%", "priceCurrency" : "GBP", "url" : "https://www.uk.plantura.garden/products/mini-wasps-against-pantry-moths?variant=43028087406755","isSet":true }, {"sku": "MW-PMMC-004C","available": false, "compareAtPriceString": "£47.98", "priceString": "£39.99", "compareAtPrice": 47.98, "price": 39.99, "sale":true, "percentage":"17%", "priceCurrency" : "GBP", "url" : "https://www.uk.plantura.garden/products/mini-wasps-against-pantry-moths?variant=43028087439523","isSet":true }, {"sku": "MW-PMMC-006C","available": false, "compareAtPriceString": "£71.97", "priceString": "£56.99", "compareAtPrice": 71.97, "price": 56.99, "sale":true, "percentage":"21%", "priceCurrency" : "GBP", "url" : "https://www.uk.plantura.garden/products/mini-wasps-against-pantry-moths?variant=43028087472291","isSet":true }, {"sku": "MW-PMMC-008C","available": false, "compareAtPriceString": "£95.96", "priceString": "£74.99", "compareAtPrice": 95.96, "price": 74.99, "sale":true, "percentage":"22%", "priceCurrency" : "GBP", "url" : "https://www.uk.plantura.garden/products/mini-wasps-against-pantry-moths?variant=43028087505059","isSet":true }, {"sku": "MW-PMMC-010C","available": false, "compareAtPriceString": "£119.95", "priceString": "£89.99", "compareAtPrice": 119.95, "price": 89.99, "sale":true, "percentage":"25%", "priceCurrency" : "GBP", "url" : "https://www.uk.plantura.garden/products/mini-wasps-against-pantry-moths?variant=43028087537827","isSet":true }], "handle" : "mini-wasps-against-pantry-moths"}, { "name": "Organic All Purpose Compost, 40L", "unitPrice" : "", "compareAtPriceString": "", "priceString": "£16.99", "compareAtPrice": 0.0, "price": 16.99, "sale":false, "percentage":"", "badge": "new", "url": "https://www.uk.plantura.garden/products/organic-all-purpose-compost-40-l", "available": false, "availabilityInfo":"", "campaignInfo":"","isSet": false, "priceLabel": "", "compareAtPriceLabel": "","reviewsData":{"reviewCount": 12, "reviewAverageValue": 4.8},"image": "https://www.uk.plantura.garden/cdn/shop/products/plantura-organic-all-purpose-compost_1100x.jpg?v=1655125318","tags": "balcony,box tree,cherry laurel,chili,chilli,coconut,compost,fig tree,Flowers,garlic,hedge,Houseplants,lettuce,monstera,oleander,olive tree,palm tree,pampas grass,perennials,plant compost,potting compost,rose,Sowing & Herbs,substrate,tomato,Trees & Shrubs,vegetable,Vegetables","bulletPoints": ["Perfect for all your house, garden \u0026 balcony plants","For strong \u0026 healthy plants as well as an active soil life","Peat-free \u0026 organic soil: CO\u003csub\u003e2\u003c\/sub\u003e-saving composition"],"variants" : [ {"sku": "CO-OAPC-040L","available": false, "compareAtPriceString": "", "priceString": "£16.99", "compareAtPrice": 0.0, "price": 16.99, "sale":false, "percentage":"", "priceCurrency" : "GBP", "url" : "https://www.uk.plantura.garden/products/organic-all-purpose-compost-40-l?variant=42515135103139","isSet":false}, {"sku": "CO-OAPC-080L","available": false, "compareAtPriceString": "£33.98", "priceString": "£31.99", "compareAtPrice": 33.98, "price": 31.99, "sale":true, "percentage":"6%", "priceCurrency" : "GBP", "url" : "https://www.uk.plantura.garden/products/organic-all-purpose-compost-40-l?variant=42515135135907","isSet":true }, {"sku": "CO-OAPC-160L","available": false, "compareAtPriceString": "£67.96", "priceString": "£62.99", "compareAtPrice": 67.96, "price": 62.99, "sale":true, "percentage":"7%", "priceCurrency" : "GBP", "url" : "https://www.uk.plantura.garden/products/organic-all-purpose-compost-40-l?variant=42515135168675","isSet":true }, {"sku": "CO-OAPC-240L","available": false, "compareAtPriceString": "£101.94", "priceString": "£91.99", "compareAtPrice": 101.94, "price": 91.99, "sale":true, "percentage":"10%", "priceCurrency" : "GBP", "url" : "https://www.uk.plantura.garden/products/organic-all-purpose-compost-40-l?variant=42515135201443","isSet":true }], "handle" : "organic-all-purpose-compost-40-l"}, { "name": "Organic Enriched Compost, 40L", "unitPrice" : "", "compareAtPriceString": "", "priceString": "£16.99", "compareAtPrice": 0.0, "price": 16.99, "sale":false, "percentage":"", "badge": "new", "url": "https://www.uk.plantura.garden/products/organic-enriched-compost-40-l", "available": false, "availabilityInfo":"", "campaignInfo":"","isSet": false, "priceLabel": "", "compareAtPriceLabel": "","reviewsData":{"reviewCount": 1, "reviewAverageValue": 5.0},"image": "https://www.uk.plantura.garden/cdn/shop/products/organic-enriched-compost-plantura_1100x.jpg?v=1657538532","tags": "aubergine,chilli,compost,courgette,cucumber,Flowers,growing medium,new,potato,potting soil,pumpkin,raised bed,raised bed compost,substrate,sunflower,tomato,Trees & Shrubs,Vegetables","bulletPoints": ["Perfect for all crops and ornamental plants with a high nutrient requirement \u0026 for raised beds","Improves soil quality \u0026 promotes healthy root growth","Peat-free \u0026 organic soil: CO\u003csub\u003e2\u003c\/sub\u003e-saving composition"],"variants" : [ {"sku": "CO-PEC1-040L","available": false, "compareAtPriceString": "", "priceString": "£16.99", "compareAtPrice": 0.0, "price": 16.99, "sale":false, "percentage":"", "priceCurrency" : "GBP", "url" : "https://www.uk.plantura.garden/products/organic-enriched-compost-40-l?variant=42681808519331","isSet":false}, {"sku": "CO-PEC2-080L","available": false, "compareAtPriceString": "£33.98", "priceString": "£31.99", "compareAtPrice": 33.98, "price": 31.99, "sale":true, "percentage":"6%", "priceCurrency" : "GBP", "url" : "https://www.uk.plantura.garden/products/organic-enriched-compost-40-l?variant=42681808552099","isSet":true }, {"sku": "CO-PEC3-160L","available": false, "compareAtPriceString": "£67.96", "priceString": "£62.99", "compareAtPrice": 67.96, "price": 62.99, "sale":true, "percentage":"7%", "priceCurrency" : "GBP", "url" : "https://www.uk.plantura.garden/products/organic-enriched-compost-40-l?variant=42681808584867","isSet":true }], "handle" : "organic-enriched-compost-40-l"}, { "name": "Organic Ericaceous Compost, 40L", "unitPrice" : "", "compareAtPriceString": "", "priceString": "£16.99", "compareAtPrice": 0.0, "price": 16.99, "sale":false, "percentage":"", "badge": "new", "url": "https://www.uk.plantura.garden/products/organic-ericaceous-compost-40-l", "available": false, "availabilityInfo":"", "campaignInfo":"","isSet": false, "priceLabel": "", "compareAtPriceLabel": "","reviewsData":{"reviewCount": 2, "reviewAverageValue": 5.0},"image": "https://www.uk.plantura.garden/cdn/shop/products/plantura-organic-ericaceous-compost_1100x.jpg?v=1657538939","tags": "acidic,acidic compost,acidic soil,acidic soil compost,azalea compost,azaleas,blueberries,compost,ericaceous compost,ericaceous compost for blueberries,ericaceous soil,Flowers,growing medium,hydrangea acidic soil,hydrangeas,HydrangeasRhododendronBlueberry,magnolias,ph value,potting soil,rhododendrons,soil for acid-loving plants,soil for bog plants,substrate","bulletPoints": ["Perfect for acid-loving plants such as hydrangeas, rhododendrons, blueberry bushes, azaleas \u0026 more","Ensures all-round healthy plants with lush blooms and aromatic berries","Peat-reduced \u0026 organic soil: CO\u003csub\u003e2\u003c\/sub\u003e-saving composition"],"variants" : [ {"sku": "CO-PECC-040L","available": false, "compareAtPriceString": "", "priceString": "£16.99", "compareAtPrice": 0.0, "price": 16.99, "sale":false, "percentage":"", "priceCurrency" : "GBP", "url" : "https://www.uk.plantura.garden/products/organic-ericaceous-compost-40-l?variant=42681822937251","isSet":false}, {"sku": "CO-PECC-080L","available": false, "compareAtPriceString": "£33.98", "priceString": "£31.99", "compareAtPrice": 33.98, "price": 31.99, "sale":true, "percentage":"6%", "priceCurrency" : "GBP", "url" : "https://www.uk.plantura.garden/products/organic-ericaceous-compost-40-l?variant=42681822970019","isSet":true }, {"sku": "CO-PECC-160L","available": false, "compareAtPriceString": "£67.96", "priceString": "£62.99", "compareAtPrice": 67.96, "price": 62.99, "sale":true, "percentage":"7%", "priceCurrency" : "GBP", "url" : "https://www.uk.plantura.garden/products/organic-ericaceous-compost-40-l?variant=42681823002787","isSet":true }], "handle" : "organic-ericaceous-compost-40-l"}, { "name": "Organic Flower Compost, 40L", "unitPrice" : "Base price: £0.42/l", "compareAtPriceString": "", "priceString": "£16.99", "compareAtPrice": 0.0, "price": 16.99, "sale":false, "percentage":"", "badge": "angebot", "url": "https://www.uk.plantura.garden/products/organic-flower-compost-40-l", "available": true, "availabilityInfo":"", "campaignInfo":"","isSet": false, "priceLabel": "", "compareAtPriceLabel": "","reviewsData":{"reviewCount": 1, "reviewAverageValue": 5.0},"image": "https://www.uk.plantura.garden/cdn/shop/products/plantura-organic-flower-compost_1100x.jpg?v=1655126469","tags": "angebot,balcony,clematis,Flowers,fuchsia,geranium,hibiscus,lily,passion flower,peony,petunia,plant compost,potting compost,rose,substrate","bulletPoints": ["Perfect for all flowering plants in garden beds \u0026 pots","For beautiful blossoms \u0026 healthy plant growth","Peat-free \u0026 organic soil: CO\u003csub\u003e2\u003c\/sub\u003e-saving composition"],"variants" : [ {"sku": "CO-POFC-040L","available": true, "compareAtPriceString": "", "priceString": "£16.99", "compareAtPrice": 0.0, "price": 16.99, "sale":false, "percentage":"", "priceCurrency" : "GBP", "url" : "https://www.uk.plantura.garden/products/organic-flower-compost-40-l?variant=42515122782371","isSet":false}, {"sku": "CO-POFC-080L","available": true, "compareAtPriceString": "£33.98", "priceString": "£29.99", "compareAtPrice": 33.98, "price": 29.99, "sale":true, "percentage":"12%", "priceCurrency" : "GBP", "url" : "https://www.uk.plantura.garden/products/organic-flower-compost-40-l?variant=42515122815139","isSet":true }, {"sku": "CO-POFC-160L","available": true, "compareAtPriceString": "£67.96", "priceString": "£57.99", "compareAtPrice": 67.96, "price": 57.99, "sale":true, "percentage":"15%", "priceCurrency" : "GBP", "url" : "https://www.uk.plantura.garden/products/organic-flower-compost-40-l?variant=42515122847907","isSet":true }, {"sku": "CO-POFC-240L","available": true, "compareAtPriceString": "£101.94", "priceString": "£84.99", "compareAtPrice": 101.94, "price": 84.99, "sale":true, "percentage":"17%", "priceCurrency" : "GBP", "url" : "https://www.uk.plantura.garden/products/organic-flower-compost-40-l?variant=42515122880675","isSet":true }], "handle" : "organic-flower-compost-40-l"}, { "name": "Organic Herb \u0026amp; Seedling Compost, 20L", "unitPrice" : "", "compareAtPriceString": "", "priceString": "£12.49", "compareAtPrice": 0.0, "price": 12.49, "sale":false, "percentage":"", "badge": "angebot", "url": "https://www.uk.plantura.garden/products/organic-herb-seedling-compost-20-l", "available": false, "availabilityInfo":"", "campaignInfo":"","isSet": false, "priceLabel": "", "compareAtPriceLabel": "","reviewsData":{"reviewCount": 4, "reviewAverageValue": 4.8},"image": "https://www.uk.plantura.garden/cdn/shop/products/plantura-organic-herb-and-seedling-compost_1100x.jpg?v=1655125011","tags": "coconut,compost,cutting,herb compost,lavender,oregano,perlite,potting compost,propagation,rosemary,sage,seedling soil,Sowing & Herbs,substrate,thyme","bulletPoints": ["Perfect for herbs as well as sowing, propagating \u0026 transplanting","For aromatic herbs \u0026 healthy seedlings with strong roots","Peat-free \u0026 organic soil: CO\u003csub\u003e2\u003c\/sub\u003e-saving composition"],"variants" : [ {"sku": "CO-OHSC-020L","available": false, "compareAtPriceString": "", "priceString": "£12.49", "compareAtPrice": 0.0, "price": 12.49, "sale":false, "percentage":"", "priceCurrency" : "GBP", "url" : "https://www.uk.plantura.garden/products/organic-herb-seedling-compost-20-l?variant=42515064946851","isSet":false}, {"sku": "CO-OHSC-040L","available": false, "compareAtPriceString": "£24.98", "priceString": "£23.99", "compareAtPrice": 24.98, "price": 23.99, "sale":true, "percentage":"4%", "priceCurrency" : "GBP", "url" : "https://www.uk.plantura.garden/products/organic-herb-seedling-compost-20-l?variant=42515064979619","isSet":true }, {"sku": "CO-OHSC-080L","available": false, "compareAtPriceString": "£49.96", "priceString": "£46.99", "compareAtPrice": 49.96, "price": 46.99, "sale":true, "percentage":"6%", "priceCurrency" : "GBP", "url" : "https://www.uk.plantura.garden/products/organic-herb-seedling-compost-20-l?variant=42515065012387","isSet":true }, {"sku": "CO-OHSC-120L","available": false, "compareAtPriceString": "£74.94", "priceString": "£68.99", "compareAtPrice": 74.94, "price": 68.99, "sale":true, "percentage":"8%", "priceCurrency" : "GBP", "url" : "https://www.uk.plantura.garden/products/organic-herb-seedling-compost-20-l?variant=42515065045155","isSet":true }], "handle" : "organic-herb-seedling-compost-20-l"}, { "name": "Organic Lawn Compost, 40L", "unitPrice" : "Base price: £0.42/l", "compareAtPriceString": "", "priceString": "£16.99", "compareAtPrice": 0.0, "price": 16.99, "sale":false, "percentage":"", "badge": "angebot", "url": "https://www.uk.plantura.garden/products/organic-lawn-compost-40-l", "available": true, "availabilityInfo":"", "campaignInfo":"","isSet": false, "priceLabel": "", "compareAtPriceLabel": "","reviewsData":{"reviewCount": 3, "reviewAverageValue": 4.7},"image": "https://www.uk.plantura.garden/cdn/shop/products/plantura-organic-lawn-compost_1100x.jpg?v=1653294323","tags": "compost,Lawn,lawn care,new lawn,seeding lawn,soil,substrate,turf","bulletPoints": ["Perfect for seeding lawns as well as for lawn care","For a resilient lawn with strong grass roots","Peat-reduced \u0026 organic soil: CO\u003csub\u003e2\u003c\/sub\u003e-saving composition"],"variants" : [ {"sku": "CO-POLC-040L","available": true, "compareAtPriceString": "", "priceString": "£16.99", "compareAtPrice": 0.0, "price": 16.99, "sale":false, "percentage":"", "priceCurrency" : "GBP", "url" : "https://www.uk.plantura.garden/products/organic-lawn-compost-40-l?variant=37777805672611","isSet":false}, {"sku": "CO-POLC-080L","available": true, "compareAtPriceString": "£33.98", "priceString": "£31.99", "compareAtPrice": 33.98, "price": 31.99, "sale":true, "percentage":"6%", "priceCurrency" : "GBP", "url" : "https://www.uk.plantura.garden/products/organic-lawn-compost-40-l?variant=37777805705379","isSet":true }, {"sku": "CO-POLC-160L","available": true, "compareAtPriceString": "£67.96", "priceString": "£62.99", "compareAtPrice": 67.96, "price": 62.99, "sale":true, "percentage":"7%", "priceCurrency" : "GBP", "url" : "https://www.uk.plantura.garden/products/organic-lawn-compost-40-l?variant=37777805738147","isSet":true }], "handle" : "organic-lawn-compost-40-l"}, { "name": "Organic Tomato \u0026amp; Vegetable Compost, 40L", "unitPrice" : "", "compareAtPriceString": "", "priceString": "£16.99", "compareAtPrice": 0.0, "price": 16.99, "sale":false, "percentage":"", "badge": "angebot", "url": "https://www.uk.plantura.garden/products/organic-tomato-vegetable-compost-40-l", "available": false, "availabilityInfo":"", "campaignInfo":"","isSet": false, "priceLabel": "", "compareAtPriceLabel": "","reviewsData":{"reviewCount": 4, "reviewAverageValue": 5.0},"image": "https://www.uk.plantura.garden/cdn/shop/products/plantura-organic-tomato-and-vegetable-compost_1100x.jpg?v=1655124455","tags": "aubergine,bean,carrot,cauliflower,chili,chilli,coconut,compost,courgette,cucumber,garlic,onion,pepper,potassium,potato,potting compost,pumpkin,radish,rhubarb,strawberry,substrate,tomato,vegetable,Vegetables","bulletPoints": ["Perfect for tomatoes \u0026 other vegetables such as chillies, courgettes \u0026 more","For strong \u0026 healthy plant growth as well as an abundant vegetable harvest","Peat-free \u0026 organic soil: CO\u003csub\u003e2\u003c\/sub\u003e-saving composition"],"variants" : [ {"sku": "CO-OTVC-040L","available": false, "compareAtPriceString": "", "priceString": "£16.99", "compareAtPrice": 0.0, "price": 16.99, "sale":false, "percentage":"", "priceCurrency" : "GBP", "url" : "https://www.uk.plantura.garden/products/organic-tomato-vegetable-compost-40-l?variant=42515129565347","isSet":false}, {"sku": "CO-OTVC-080L","available": false, "compareAtPriceString": "£33.98", "priceString": "£31.99", "compareAtPrice": 33.98, "price": 31.99, "sale":true, "percentage":"6%", "priceCurrency" : "GBP", "url" : "https://www.uk.plantura.garden/products/organic-tomato-vegetable-compost-40-l?variant=42515129598115","isSet":true }, {"sku": "CO-OTVC-160L","available": false, "compareAtPriceString": "£67.96", "priceString": "£62.99", "compareAtPrice": 67.96, "price": 62.99, "sale":true, "percentage":"7%", "priceCurrency" : "GBP", "url" : "https://www.uk.plantura.garden/products/organic-tomato-vegetable-compost-40-l?variant=42515129630883","isSet":true }, {"sku": "CO-OTVC-240L","available": false, "compareAtPriceString": "£101.94", "priceString": "£91.99", "compareAtPrice": 101.94, "price": 91.99, "sale":true, "percentage":"10%", "priceCurrency" : "GBP", "url" : "https://www.uk.plantura.garden/products/organic-tomato-vegetable-compost-40-l?variant=42515129663651","isSet":true }], "handle" : "organic-tomato-vegetable-compost-40-l"}, { "name": "Pantry Moth Traps 6-pack", "unitPrice" : "", "compareAtPriceString": "", "priceString": "£8.99", "compareAtPrice": 0.0, "price": 8.99, "sale":false, "percentage":"", "badge": "angebot", "url": "https://www.uk.plantura.garden/products/pantry-moth-traps", "available": false, "availabilityInfo":"", "campaignInfo":"","isSet": false, "priceLabel": "", "compareAtPriceLabel": "","reviewsData":{"reviewCount": 6, "reviewAverageValue": 4.8},"image": "https://www.uk.plantura.garden/cdn/shop/products/pantry-moth-traps-plantura_1100x.jpg?v=1657533454","tags": "cacao moths,flour moths,food moth traps,indian meal moths,mediterranean flour moths,moth traps,pantry moth traps,pantry moths,pheromone traps,sticky traps","bulletPoints": ["6 odourless, long-lasting pantry moth traps","Ideal for detecting infestations in kitchens \u0026 pantries early on","100% insecticide-free \u0026 non-toxic"],"variants" : [ {"sku": "MT-PMT1-TK06","available": false, "compareAtPriceString": "", "priceString": "£8.99", "compareAtPrice": 0.0, "price": 8.99, "sale":false, "percentage":"", "priceCurrency" : "GBP", "url" : "https://www.uk.plantura.garden/products/pantry-moth-traps?variant=42645980676259","isSet":false}], "handle" : "pantry-moth-traps"}, { "name": "Plantable Calendar 2024", "unitPrice" : "", "compareAtPriceString": "£24.99", "priceString": "£19.99", "compareAtPrice": 24.99, "price": 19.99, "sale":true, "percentage":"20%", "badge": "bestseller", "url": "https://www.uk.plantura.garden/products/plantable-calendar", "available": false, "availabilityInfo":"Sold out - back in autumn of 2024", "campaignInfo":"gifts","isSet": false, "priceLabel": "", "compareAtPriceLabel": "","reviewsData":{"reviewCount": 411, "reviewAverageValue": 4.5},"image": "https://www.uk.plantura.garden/cdn/shop/files/plantable-calendar-plantura_1476x.png?v=1695111853", "overlayImage": "https://www.uk.plantura.garden/cdn/shop/files/organic-badge-overlay.png?v=1695132633", "overlayHidden": false ,"tags": "bestseller,calendar,garden calendar,gift idea,plant calendar,plantable calendar guide,present,seed,seed calendar,seeds,sowing,wall calendar","bulletPoints": ["Beautiful limited edition wall calendar","Comes in an A4 and handy A5 format","Includes 12 sheets of seed paper with organic seeds to plant at home"],"variants" : [ {"sku": "PC-UKPC-00A5","available": false, "compareAtPriceString": "£24.99", "priceString": "£19.99", "compareAtPrice": 24.99, "price": 19.99, "sale":true, "percentage":"20%", "priceCurrency" : "GBP", "url" : "https://www.uk.plantura.garden/products/plantable-calendar?variant=47001535840598","isSet":false}, {"sku": "PC-UKPC-A502","available": false, "compareAtPriceString": "£48.98", "priceString": "£36.69", "compareAtPrice": 48.98, "price": 36.69, "sale":true, "percentage":"25%", "priceCurrency" : "GBP", "url" : "https://www.uk.plantura.garden/products/plantable-calendar?variant=47007991857494","isSet":false}, {"sku": "PC-UKPC-A503","available": false, "compareAtPriceString": "£74.97", "priceString": "£56.19", "compareAtPrice": 74.97, "price": 56.19, "sale":true, "percentage":"25%", "priceCurrency" : "GBP", "url" : "https://www.uk.plantura.garden/products/plantable-calendar?variant=47007991890262","isSet":false}, {"sku": "PC-UKPC-A504","available": false, "compareAtPriceString": "£99.96", "priceString": "£74.89", "compareAtPrice": 99.96, "price": 74.89, "sale":true, "percentage":"25%", "priceCurrency" : "GBP", "url" : "https://www.uk.plantura.garden/products/plantable-calendar?variant=47007991923030","isSet":false}, {"sku": "PC-UKPC-A505","available": false, "compareAtPriceString": "£124.95", "priceString": "£93.69", "compareAtPrice": 124.95, "price": 93.69, "sale":true, "percentage":"25%", "priceCurrency" : "GBP", "url" : "https://www.uk.plantura.garden/products/plantable-calendar?variant=47007991955798","isSet":false}, {"sku": "PC-UKPC-00A4","available": false, "compareAtPriceString": "£34.99", "priceString": "£29.69", "compareAtPrice": 34.99, "price": 29.69, "sale":true, "percentage":"15%", "priceCurrency" : "GBP", "url" : "https://www.uk.plantura.garden/products/plantable-calendar?variant=47001535873366","isSet":false}, {"sku": "PC-UKPC-A402","available": false, "compareAtPriceString": "£69.98", "priceString": "£55.89", "compareAtPrice": 69.98, "price": 55.89, "sale":true, "percentage":"20%", "priceCurrency" : "GBP", "url" : "https://www.uk.plantura.garden/products/plantable-calendar?variant=47007991988566","isSet":false}, {"sku": "PC-UKPC-A403","available": false, "compareAtPriceString": "£104.97", "priceString": "£78.69", "compareAtPrice": 104.97, "price": 78.69, "sale":true, "percentage":"25%", "priceCurrency" : "GBP", "url" : "https://www.uk.plantura.garden/products/plantable-calendar?variant=47007992021334","isSet":false}, {"sku": "PC-UKPC-A404","available": false, "compareAtPriceString": "£139.96", "priceString": "£104.89", "compareAtPrice": 139.96, "price": 104.89, "sale":true, "percentage":"25%", "priceCurrency" : "GBP", "url" : "https://www.uk.plantura.garden/products/plantable-calendar?variant=47007992054102","isSet":false}, {"sku": "PC-UKPC-A405","available": false, "compareAtPriceString": "£174.95", "priceString": "£131.19", "compareAtPrice": 174.95, "price": 131.19, "sale":true, "percentage":"25%", "priceCurrency" : "GBP", "url" : "https://www.uk.plantura.garden/products/plantable-calendar?variant=47007992086870","isSet":false}], "handle" : "plantable-calendar"}, { "name": "Regrow Your Veggies Book", "unitPrice" : "", "compareAtPriceString": "", "priceString": "£14.99", "compareAtPrice": 0.0, "price": 14.99, "sale":false, "percentage":"", "badge": "bestseller", "url": "https://www.uk.plantura.garden/products/book-regrow-your-veggies", "available": true, "availabilityInfo":"", "campaignInfo":"","isSet": false, "priceLabel": "", "compareAtPriceLabel": "","reviewsData":{"reviewCount": 20, "reviewAverageValue": 4.8},"image": "https://www.uk.plantura.garden/cdn/shop/products/regrow-your-veggies-book_1100x.jpg?v=1652857785","tags": "Books,gift,gift idea,paperback,regrow,regrowing,vegetables","bulletPoints": ["Easy-to-follow instructions \u0026 beautiful illustrations","Regrow more than 20 fruits and vegetables at home","Perfect gift for anyone who wants to make the world a little greener"],"variants" : [ {"sku": "RG-RGYV-UK01","available": true, "compareAtPriceString": "", "priceString": "£14.99", "compareAtPrice": 0.0, "price": 14.99, "sale":false, "percentage":"", "priceCurrency" : "GBP", "url" : "https://www.uk.plantura.garden/products/book-regrow-your-veggies?variant=42466570305699","isSet":false}], "handle" : "book-regrow-your-veggies"}, { "name": "Rose Food, 1.5kg", "unitPrice" : "Base price: £8.66/kg", "compareAtPriceString": "", "priceString": "£12.99", "compareAtPrice": 0.0, "price": 12.99, "sale":false, "percentage":"", "badge": "bestseller", "url": "https://www.uk.plantura.garden/products/rose-food-1-5-kg", "available": true, "availabilityInfo":"", "campaignInfo":"","isSet": false, "priceLabel": "", "compareAtPriceLabel": "","reviewsData":{"reviewCount": 1, "reviewAverageValue": 5.0},"image": "https://www.uk.plantura.garden/cdn/shop/products/plantura-rose-food_1100x.jpg?v=1656337714","tags": "bush rose,climbing rose,Flowers,granular fertiliser,ground cover rose,hybrid tea rose,miniature rose,plant fertiliser,rose rust,rose tree,Roses,shrub rose,slow release fertiliser,vinasse,wild rose","bulletPoints": ["For beautifully flowering roses in pots \u0026 flower beds","Prevents common rose diseases \u0026 ensures healthy growth","Long-lasting fertiliser that is free from animal products - child \u0026 pet friendly"],"variants" : [ {"sku": "GF-PRF1-R15K","available": true, "compareAtPriceString": "", "priceString": "£12.99", "compareAtPrice": 0.0, "price": 12.99, "sale":false, "percentage":"", "priceCurrency" : "GBP", "url" : "https://www.uk.plantura.garden/products/rose-food-1-5-kg?variant=37777821630627","isSet":false}, {"sku": "GF-PRF1-R03K","available": true, "compareAtPriceString": "£25.98", "priceString": "£24.99", "compareAtPrice": 25.98, "price": 24.99, "sale":true, "percentage":"4%", "priceCurrency" : "GBP", "url" : "https://www.uk.plantura.garden/products/rose-food-1-5-kg?variant=37777821663395","isSet":true }, {"sku": "GF-PRF1-R06K","available": true, "compareAtPriceString": "£51.96", "priceString": "£47.99", "compareAtPrice": 51.96, "price": 47.99, "sale":true, "percentage":"8%", "priceCurrency" : "GBP", "url" : "https://www.uk.plantura.garden/products/rose-food-1-5-kg?variant=37777821696163","isSet":true }, {"sku": "GF-PRF1-R12K","available": true, "compareAtPriceString": "£103.92", "priceString": "£93.99", "compareAtPrice": 103.92, "price": 93.99, "sale":true, "percentage":"10%", "priceCurrency" : "GBP", "url" : "https://www.uk.plantura.garden/products/rose-food-1-5-kg?variant=37777821728931","isSet":true }], "handle" : "rose-food-1-5-kg"}, { "name": "Shady Lawn Seed, 2kg, 80m2 coverage", "unitPrice" : "Base price: £12.50/kg", "compareAtPriceString": "£29.99", "priceString": "£24.99", "compareAtPrice": 29.99, "price": 24.99, "sale":false, "percentage":"17%", "badge": "angebot", "url": "https://www.uk.plantura.garden/products/shady-lawn-seed-2-kg", "available": true, "availabilityInfo":"", "campaignInfo":"","isSet": false, "priceLabel": "", "compareAtPriceLabel": "","reviewsData":{"reviewCount": 3, "reviewAverageValue": 5.0},"image": "https://www.uk.plantura.garden/cdn/shop/products/shady-lawn-seed-plantura_1100x.jpg?v=1657702052","tags": "angebot,grass seed,grasses,Lawn,lawn seed,meadow,New Lawn,rsm,seed,seeds,soil,sowing,spreader","bulletPoints": ["Shade-tolerant lawn seeds for a healthy \u0026 lush green lawn","For shady \u0026 partially shady areas - stronger grass instead of moss \u0026 weeds","Premium lawn seed mixture with high-quality, certified grass varieties"],"variants" : [ {"sku": "LS-PSLS-02KG","available": true, "compareAtPriceString": "£29.99", "priceString": "£24.99", "compareAtPrice": 29.99, "price": 24.99, "sale":true, "percentage":"17%", "priceCurrency" : "GBP", "url" : "https://www.uk.plantura.garden/products/shady-lawn-seed-2-kg?variant=37777803837603","isSet":false}, {"sku": "LS-PSLS-04KG","available": true, "compareAtPriceString": "£59.98", "priceString": "£45.99", "compareAtPrice": 59.98, "price": 45.99, "sale":true, "percentage":"23%", "priceCurrency" : "GBP", "url" : "https://www.uk.plantura.garden/products/shady-lawn-seed-2-kg?variant=37777803870371","isSet":true }, {"sku": "LS-PSLS-10KG","available": true, "compareAtPriceString": "£149.95", "priceString": "£99.99", "compareAtPrice": 149.95, "price": 99.99, "sale":true, "percentage":"33%", "priceCurrency" : "GBP", "url" : "https://www.uk.plantura.garden/products/shady-lawn-seed-2-kg?variant=37777803903139","isSet":true }], "handle" : "shady-lawn-seed-2-kg"}, { "name": "Tomato Food, 1.5kg", "unitPrice" : "Base price: £6.66/kg", "compareAtPriceString": "£12.99", "priceString": "£9.99", "compareAtPrice": 12.99, "price": 9.99, "sale":false, "percentage":"23%", "badge": "angebot", "url": "https://www.uk.plantura.garden/products/tomato-food-1-5-kg", "available": true, "availabilityInfo":"", "campaignInfo":"","isSet": false, "priceLabel": "", "compareAtPriceLabel": "","reviewsData":{"reviewCount": 1, "reviewAverageValue": 5.0},"image": "https://www.uk.plantura.garden/cdn/shop/products/plantura-tomato-food_1100x.jpg?v=1656337112","tags": "angebot,aubergine,beans,berry fertiliser,carrot,cauliflower,chili,chilli,courgette,cucumber,garlic,granular fertiliser,onions,peppers,plant fertiliser,potassium,potato,pumpkin,radishes,rhubarb,slow release fertiliser,strawberries,Tomatoes,Vegetables,vinasse","bulletPoints": ["Perfect for tomatoes, chillies, courgettes, cucumber \u0026 more","For healthy plants \u0026 an abundant tomato harvest","Long-lasting fertiliser that is free from animal products - child \u0026 pet friendly"],"variants" : [ {"sku": "GF-PTF1-T15K","available": true, "compareAtPriceString": "£12.99", "priceString": "£9.99", "compareAtPrice": 12.99, "price": 9.99, "sale":true, "percentage":"23%", "priceCurrency" : "GBP", "url" : "https://www.uk.plantura.garden/products/tomato-food-1-5-kg?variant=37777826021539","isSet":false}, {"sku": "GF-PTF1-T03K","available": true, "compareAtPriceString": "£25.98", "priceString": "£19.49", "compareAtPrice": 25.98, "price": 19.49, "sale":true, "percentage":"25%", "priceCurrency" : "GBP", "url" : "https://www.uk.plantura.garden/products/tomato-food-1-5-kg?variant=37777826054307","isSet":true }, {"sku": "GF-PTF1-T06K","available": true, "compareAtPriceString": "£51.96", "priceString": "£37.99", "compareAtPrice": 51.96, "price": 37.99, "sale":true, "percentage":"27%", "priceCurrency" : "GBP", "url" : "https://www.uk.plantura.garden/products/tomato-food-1-5-kg?variant=37777826087075","isSet":true }, {"sku": "GF-PTF1-T12K","available": true, "compareAtPriceString": "£103.92", "priceString": "£69.99", "compareAtPrice": 103.92, "price": 69.99, "sale":true, "percentage":"33%", "priceCurrency" : "GBP", "url" : "https://www.uk.plantura.garden/products/tomato-food-1-5-kg?variant=37777826119843","isSet":true }], "handle" : "tomato-food-1-5-kg"}, { "name": "Yellow Sticky Traps 20-pack", "unitPrice" : "", "compareAtPriceString": "", "priceString": "£9.49", "compareAtPrice": 0.0, "price": 9.49, "sale":false, "percentage":"", "badge": "angebot", "url": "https://www.uk.plantura.garden/products/yellow-sticky-traps", "available": false, "availabilityInfo":"", "campaignInfo":"","isSet": false, "priceLabel": "", "compareAtPriceLabel": "","reviewsData":{"reviewCount": 8, "reviewAverageValue": 4.8},"image": "https://www.uk.plantura.garden/cdn/shop/products/yellow-sticky-traps-plantura_1100x.jpg?v=1657525970","tags": "aphids,dual sided sticky traps,flying aphids,fungus gnats,plant insect trap,sticky trap for insects,sticky traps,sticky traps for gnats,sticky yellow fly traps,thrips,whiteflies,yellow sticky traps for fungus gnats","bulletPoints": ["For detecting infestations early on and monitoring pest populations","20 double-sided yellow sticky traps (or 40 smaller traps) to hang from plants or stick straight into soil","Odourless \u0026 insecticide-free"],"variants" : [ {"sku": "ST-YST1-FG40","available": false, "compareAtPriceString": "", "priceString": "£9.49", "compareAtPrice": 0.0, "price": 9.49, "sale":false, "percentage":"", "priceCurrency" : "GBP", "url" : "https://www.uk.plantura.garden/products/yellow-sticky-traps?variant=42645911666851","isSet":false}], "handle" : "yellow-sticky-traps"}] }
£9.99
Base price: £6.66/kg £29.99
Base price: £2.86/kg £9.99
Base price: £6.66/kg £9.99
Base price: £6.66/kg via 


 To the Plantura products